There have always been different techniques for making orthotic insoles, regardless of the type of patient or pathology. Most professionals choose to make the insoles manually (either in resins, EVA, thermoplastics…), while others prefer to have the work done by external companies or even opt for CAD CAM systems.
In recent years, a technique that more and more podiatrists are using is the creation of their insoles in 3D, thanks to the flexibility it offers in terms of design and replication.
A 3D insole is not only innovative because of its finish, but also because the whole process is based on digitalized inputs, which minimizes the possibility of error and subsequent polishing and corrections on the insole, and makes it possible to create technically more complex, totally personalized insoles.
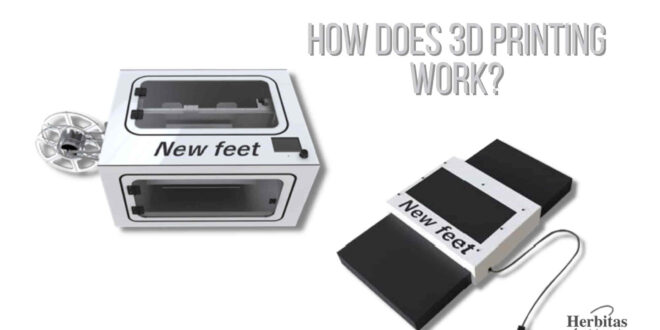
In this article we want to go over the whole digital process that is followed to make these 3D templates, how the measurements are taken, how the corrections are made, the solutions offered and finally what the final result is like. To do so, we are going to show real cases made with our Newfeet 3D orthotic insole printing equipment, will you join us?
What do you need to 3D print your insoles?
In addition to the 3D printer itself and the filament (which would be like the “ink” in a conventional printer), you need a scanner that allows us to make the scanned model of our foot, and specific software with which we are going to work with this scanned model.
With these elements, the professional is completely autonomous when it comes to taking the measurements, designing the template, making the necessary adjustments and finally printing.
Let’s look at each element separately:
3D scanner:
This is a real 3D scanner.
It is wireless.
The accuracy is total and it is even able to scan the foot, phenolic foams or even the positive mold.
PC and software:
The PC includes integrated software with which we can make any correction we need in a quick and easy way, as we will see later.
3D printer:
It makes a pair of templates in 1’30 to 1’50 hours (depending on the size).
The power consumption is similar to that of a laptop computer.
In terms of noise, it is very quiet and does not generate waste.
It is prepared to work with Newfeet filament and is able to perform the extrusion of the material with the required precision.
Filament material: Patented material.
With the same material, the printer can print on different parts of the Shore A stencil from 18 to 92, there is no limit of different hardnesses within the same stencil.
Mechanically it provides a very high memory, even at low densities.
The resulting stencil is breathable, wettable, low weight, polishable and can accept any type of glue for the lining.
What is the process of creating 3D orthotic insoles?
Once the patient has been analyzed, we proceed to scan both feet using the 3D scanner (about 30 seconds per foot).
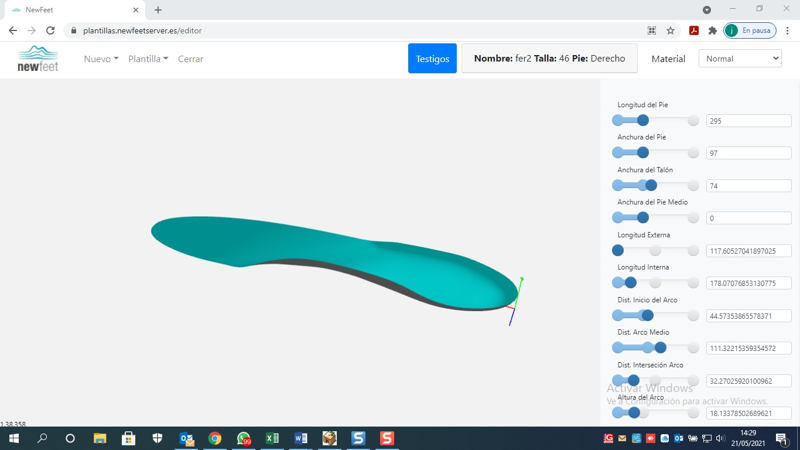
On the PC screen, we can visualize this 3D scan of the patient’s footprint, via Bluetooth. The software proposes the total contact template that fits the footprint, and on the software itself we can make the corrections we are interested in.
Once the project is finished, it is transferred to an SD card in the PC, which we remove and insert into the printer’s slot.
The most important step in this process is the use of the software to obtain the perfect result, so we are going to see step by step how to use it.
NewFeet software. 4 steps.
Common aspects of the 4 steps: We can modify any parameter in 2 ways, either by moving left/right a value to modify it, or by typing numerically the value we want for each one.
Step 1: Dimensions
On the first screen you will find options such as modifying the length and width of the template in mm.
The most usual is to modify (if applicable) the height of the anatomical arch of the patient, determine the height of the cup….
We can also make other types of modifications such as changing the starting point of the internal arch height to distal or proximal (to splint or release MMTF I), among several other parameters.
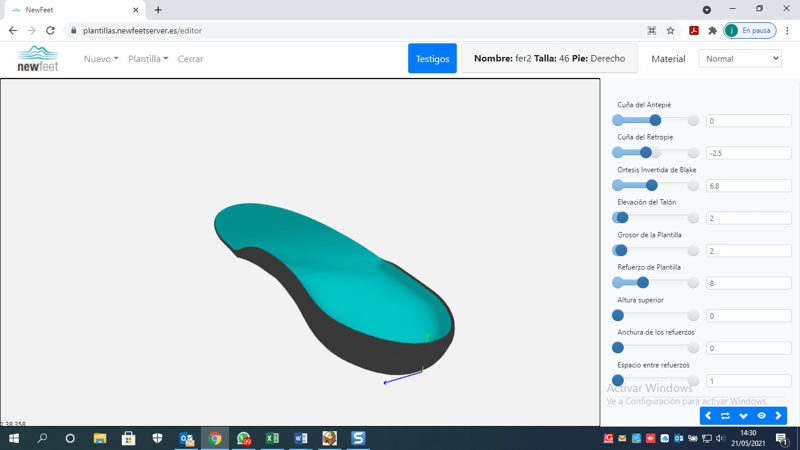
Step 2: Prono-supinations and/or reinforcements
We can make integrated pronation or supination wedges of the desired millimeters in the forefoot and rearfoot. We can also perform inversion/eversion balancing.
In case of dysmetry, we can make a rise, indicating the height.
In addition, we can implement ALI reinforcement bars to increase the strength of the ALI and reinforce the internal column.
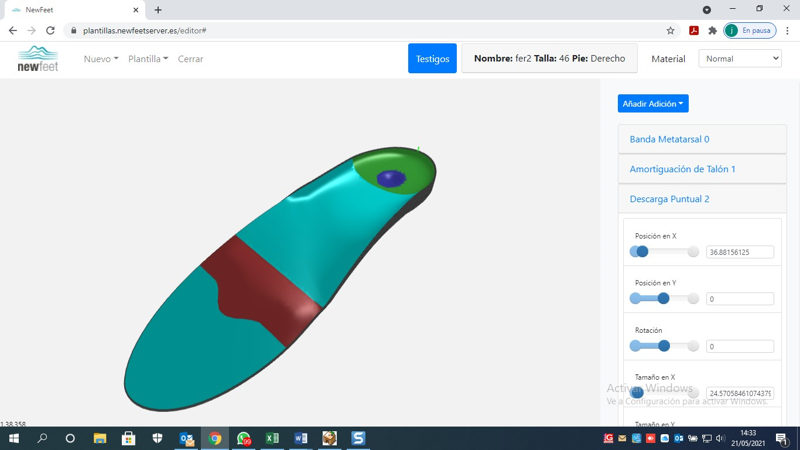
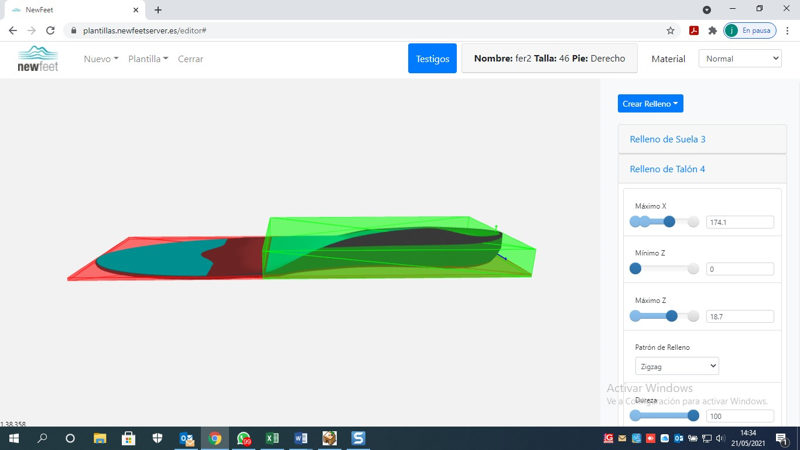
Step 3: Corrections
All imaginable: bars, almonds, cut out, fascial accommodation, medial/ lateral Heel Skive, fenestrations (with the shape and depth of interest), specific cushioning zones, etc…
Each correction can be modified in height, size, shape and even density.
Step 4: Filling
This step is optional. It is a tool that allows you to select a specific area of the insole for a final density change. The most interesting thing is that this modification can also be done in “height”, i.e. I can decide that the density change affects the area in contact with the foot, in the middle of the body of the insole or near the sole.
With this last step we can achieve the effect of an insole with an air chamber if we want to.
What is the final result of 3D printed insoles like?
The resulting insoles are very similar to thermoformed EVA insoles in their shape and comfort; however, they provide other advantages such as lightness, durability and breathability. In addition, there is no memory loss, which is a handicap that other materials do have.
They can be polished if necessary and can also be lined with any type of lining with normal glue.
In principle it is advisable to line the insoles, but for example for sports use they could be used without lining so that they can be machine washed.
In case a replica is needed, the project is saved in the memory of the PC and is therefore easily accessible at any time.
The cost per pair of insoles depends on the size and densities of the design, but averages around €3.5 per pair.
What is the difference with the CAD CAM system?
As we know, until now, the alternative to computerized manufacturing of templates has been computer numerical control (cnc) milling machine systems by Cad Cam. Let’s take a look at the differences between the systems:
3D system
System cost 8500€.
Cost per template 3,5€.
Unlimited densities
Foot, phenol, plaster scanning
Printing time 90 min
Breathable insoles
High memory material
Almost no noise level
Cad Cam system
System cost 30-35000€.
Cost per block 12 to 25€.
Mono or bi-density
Foot scanning
Printing time 20 min
Non-breat able insoles
Medium memory material
Motor and suction noise
We hope that the article has been interesting for you. If you want to know more about the Newfeet system, you can visit our webinar on our YouTube channel where the podiatrist and professor D. Antonio Jesús García explains, step by step, how to use it.
And if you want a live demo, you can contact us.
Laboratorios Herbitas es una compañía especializada en la fabricación y distribución de productos podológicos y de fisioterapia. Poseemos 30 años de experiencia en el mercado clínico.
Gracias a nuestra experiencia y contacto con los profesionales en biomecánica y cuidado del pie, nuestros productos son diseñados y aprobados por reconocidos profesionales del sector.
Contamos con una de las gamas más amplias del mercado, estando presentes en más de 40 países de Europa, África y América.